This article explains how to structure and reorder content inside a Curation using sections.
Once you’ve added content to a Curation, organizing it into sections helps make the learning experience more focused and digestible, especially when you’re curating a lot of content or designing a multi-part program.
What are sections?
Sections are optional headings within a Curation that let you group related content together. You might use them to organize content by theme, level, or sequence. For example, in a Curation titled Building a Team, you might utilize the following Sections:
- Giving and Receiving Feedback
- Coaching and Mentoring
- Best Hiring Practices
Alternatively, you might use sections within a single Curation to designate the intended learners. For instance, in a Curation about communication, you might utilize the following sections:
- Individual Contributors
- Aspiring leaders
- Team Managers
- Senior Leaders
Sections appear as titled dividers within your Curation and are visible to anyone you share it with.
How do I add a section?
Open your Curation and ensure there's at least one piece of content in the Curation.
Click the + Add Content button and click Section in the menu.
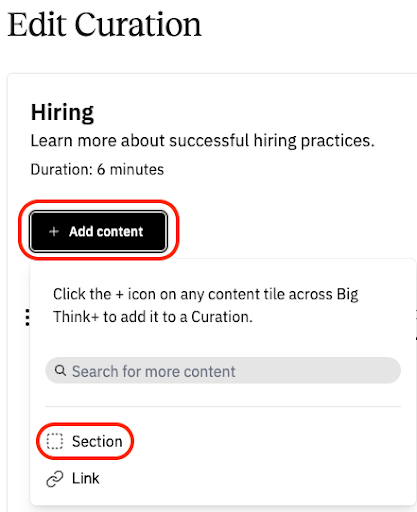
Give your section a name and description. Both will autosave as you type.


You can add as many sections as you'd like.
How do I move content into a section?
Locate the content you want to move.
Use the drag handle to drag the content into the section you want.
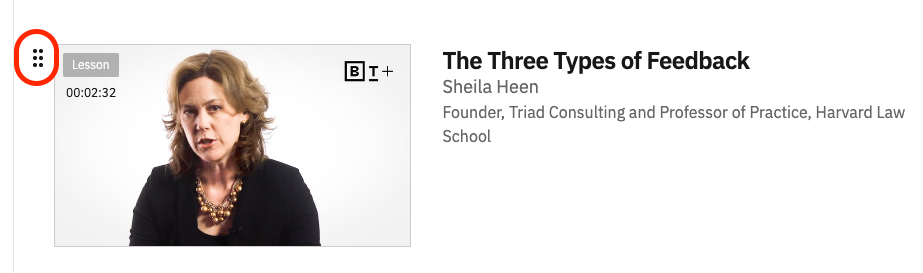
Drop it in place. Your changes are saved automatically.

You can also rearrange content within sections or move it between sections as needed.
How do I reorder sections?
Click and drag any section by its drag handle to move it up or down in your Curation layout. Alternatively, you can use the multi-arrow button in the top right corner of a section to move it up, down, or to the top or bottom of a Curation.
